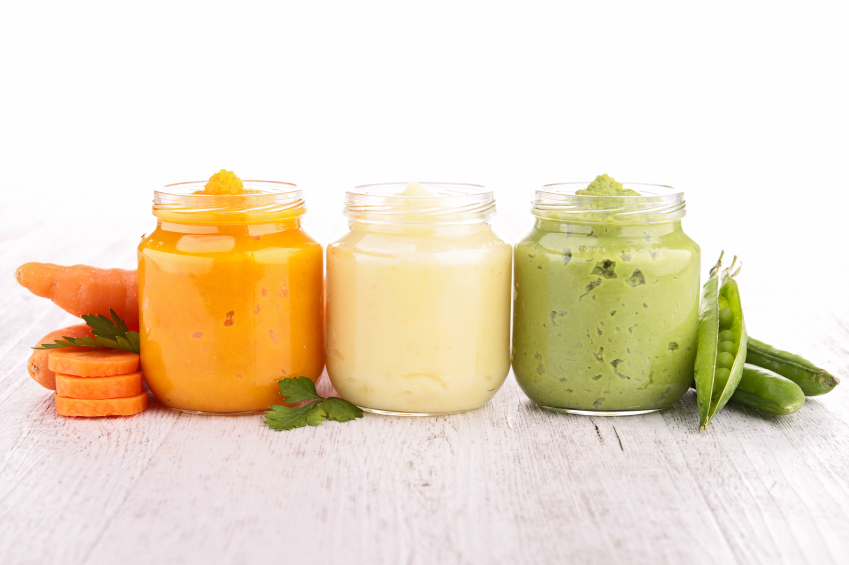
How to make your own baby food in four easy steps

When my first child started eating solids I decided to experiment in making my own baby food. I have to admit that I thought it would be time consuming and a hassle, but once I started and got the hang of it, it was easy and enjoyable.
There are many benefits to making your own baby food if you decide to try it out. You have control of what goes into your baby food (you can use the best possible ingredients!), it’s economical, and you can get creative introducing new tastes and foods you would otherwise not find in commercially bought baby food. Homemade baby food can also taste so much better than store bought brands (let’s admit we have all tried our baby’s food at one point or another and some of the store bought brands are hard to keep down).
Below are directions for making baby food in four easy steps. Always check with your baby’s paediatrician or healthcare provider before deciding to start your baby on solids, and discuss food allergies and what you can and cannot give to your baby.
Getting started with the right equipment
Before getting started, make sure you have the right equipment. First, you will need either a blender, food processor or some sort of device that will puree the food for you. I really love my trusted Baby Bullet, it’s so easy to clean and it comes with everything that I need. There are also many other products out there geared specifically for making baby food such as the Beaba Babycook, Baby Brezza, and Oxo Tot Baby Food Mill. They all generally do the same thing so choose one that appeals to you.
Other things you will need: a spatula, storage containers (for example, BPA free ice cube trays such as baby trays, freezer bags for storing the cubes in after they are frozen, portable baby food pouches, mini mason jars or similar glass containers), a pot or food steamer (to cook your food in), cutting board, knife and generous size bowls to hold your food while prepping.
I prefer to use organic and the freshest and best possible ingredients whenever I can. Frozen foods can work fine too, especially if you do not have access to a certain fruit or vegetable or if it is not in season (but check with your baby’s healthcare provider first if you plan to refreeze).
The 4 step quick and easy process
When starting your baby on solids, always begin with single foods and slowly add other foods together as your baby gets accustomed to eating different foods. This way you will be able to find out if your baby has any food allergies or an aversion to certain foods and textures. But keep in mind that it may take dozens of tries before your baby begins to love certain foods – be persistent but not too pushy.
Below are the steps for making baby food from a single ingredient but the process is the same for baby food that contains more than one ingredient. For more than one ingredient (including fruits and veggies, grains, cooked meats or fish and sauces), combine the ingredients when cooking or cook separately and combine ingredients when you are pureeing the foods.
I like to make a week or two worth of baby food at a time because life can get a bit hectic with little ones. You could make as much baby food as you like as long as you can freeze or store it for later use. Baby food can be stored for up to two or three days in the refrigerator. Frozen baby food is typically good for up to one month.
Step 1: Prep the food.
Thoroughly washing fruits and vegetables and peel the rind or skin if there is any. Cut up your fruit or vegetable into smaller pieces for cooking (the smaller you cut it up, the faster it cooks). You do not need to cut up certain foods such as spinach as it easily purees in whole form.
Step 2: Cook or steam your food.
Do not overcook fruits and vegetables to help preserve as much of the vitamins and nutrients possible. Reserve the water your food or vegetable was cooked in and set aside.
Step 3: Puree your baby food.
Put your cooked foods into your blender, food processor or baby food maker device. When pureeing fruits and vegetables, add a bit of the reserved water you set aside and puree, adding more water (if needed) depending on the consistency you would like your baby food. You can add less water when you’re pureeing as your baby gets older to introduce more texture to your baby’s food.
Step 4: Store your baby food.
Pour your pureed food into ice cube trays (to freeze and store for later use) or into pouches or mini mason jars (to store in the refrigerator). If your ice cube trays do not have lids, you could cover them with saran wrap. To help save space in your freezer, put the frozen cubes into freezer bags – you could put a number of different flavours of frozen cubes into each freezer bag so that when you thaw each bag your baby will have a variety of foods to choose from! Don’t forget to date and label your trays, jars or other baby food packages.
Voila! You now have successfully made your own baby food.
Now get creative!
Once you are comfortable with making single foods, you can get more creative and adventurous with the types of ingredients you use. If your baby is doing well with eating solid foods and does not have food aversions or digestive upsets, then you can try more creative ingredients. In many different cultures, babies all over the world are introduced to a wide variety of foods that we may not commonly give to our babies in North America. Many of these foods are packed with tons of nutrients and vitamins.
When my little ones were ready for new tastes and textures, I loved introducing foods that you would not typically find in commercial baby food products and that are really good and wholesome, such as legumes, ancient grains, tofu, exotic fruits (mangoes, lychees, papaya and passion fruit to name a few), herbs and spices (yes, you can use these to flavour your baby’s food), onions, mushrooms and celery.
Again, always check with your baby’s paediatrician or healthcare provider on types of foods you can give to your baby. You will be able to introduce more textures and types of foods as your baby gets older – eventually you may be able to simply puree the meals you’ve prepared for yourself or other members of your family!
Please share your best baby food recipes with us in the comments below!
About the author
 Phyllis Oruclar is a wife and mother of three very loud boys. She has worked in the fashion industry for over 17 years and has a love for anything designed well.
Phyllis contributes to Calmparent.net because she believes in reconciling her own personal goals with being a busy mother. She is a supporter of what it represents for women – simplifying your life to find balance so that you can pursue your hobbies, or work while still being a dedicated mother. Phyllis is also a personal advocate of Calm Baby Sleep Routine which she used to get her third child on a good sleep routine.
Phyllis enjoys trying new recipes and spending time with her family. She also likes being outdoors, reading a good novel, writing and window-shopping online. Her dynamic and practical ideas are a breath of fresh air for mothers trying to maintain a sense of balance!
Sleep is so important but the optimal amount is different for each family member.
It depends on age and other factors.
Find out the healthy sleep ranges by age, for you and your growing family.
Starting with babies (newborn to one year),
toddlers, preschoolers, school aged
children, teens and adults.
Guide to optimal family sleep (daytime naps & at night)
FREE download
Be the first to know about special
offers and resources
for our community only.
Don't miss out!
Become a Calm Parent Insider
FREE gifts & resources
CALMMOTHER LIMITED © 2023 | ALL RIGHTS RESERVED
terms | privacy | contact
Simplifying life for parents so you can focus on what matters most to you.
Live your best life with kids!
+ Show / Hide Comments
Share to: